Thursday, 12 February 2015

Week 19 Concluding initial ideas

The busy period continued with more idea generation and development.
I took one of the milkmaid photosbashes and added some details from the other ideas. The development of the idea continued with a search for an interesting silhouette, so I created some examples.
Following the style guide, the idea was to stick to chunky shapes, which is why I added more volume to the overall shape where possible. After deciding what silhouette worked well, it was time to generate value examples and colour tests.
Mapping out volumes in a big number was quite difficult, as my character was meant to have a very light blouse. It was important to keep lighter areas on top/middle of the character, so the viewers eye would have a better focus point.
Later it was time to collect some colour references, and those came from images of Renaissance and Rococo period paintings. The colour palettes were applied on my milkmaid ideas. The colours again following the style guide were warm and because the village is meant to have happy soft colours. There were two examples that I have considered using for my final design when texturing.
Aside the character project, in visual design we focused on foreshortening. Foreshortening appears when something like a human is sitting at an odd angle to the viewers position. Foreshortening mostly appears in the limbs, for example a leg may seem shorter or an arm.
I have to admit foreshortening is a very weak area of mine, but I did try to focus and push myself to achieve a more believable human figure with the distortion foreshortening created.



Thursday, 5 February 2015

Week 18 The Village Character


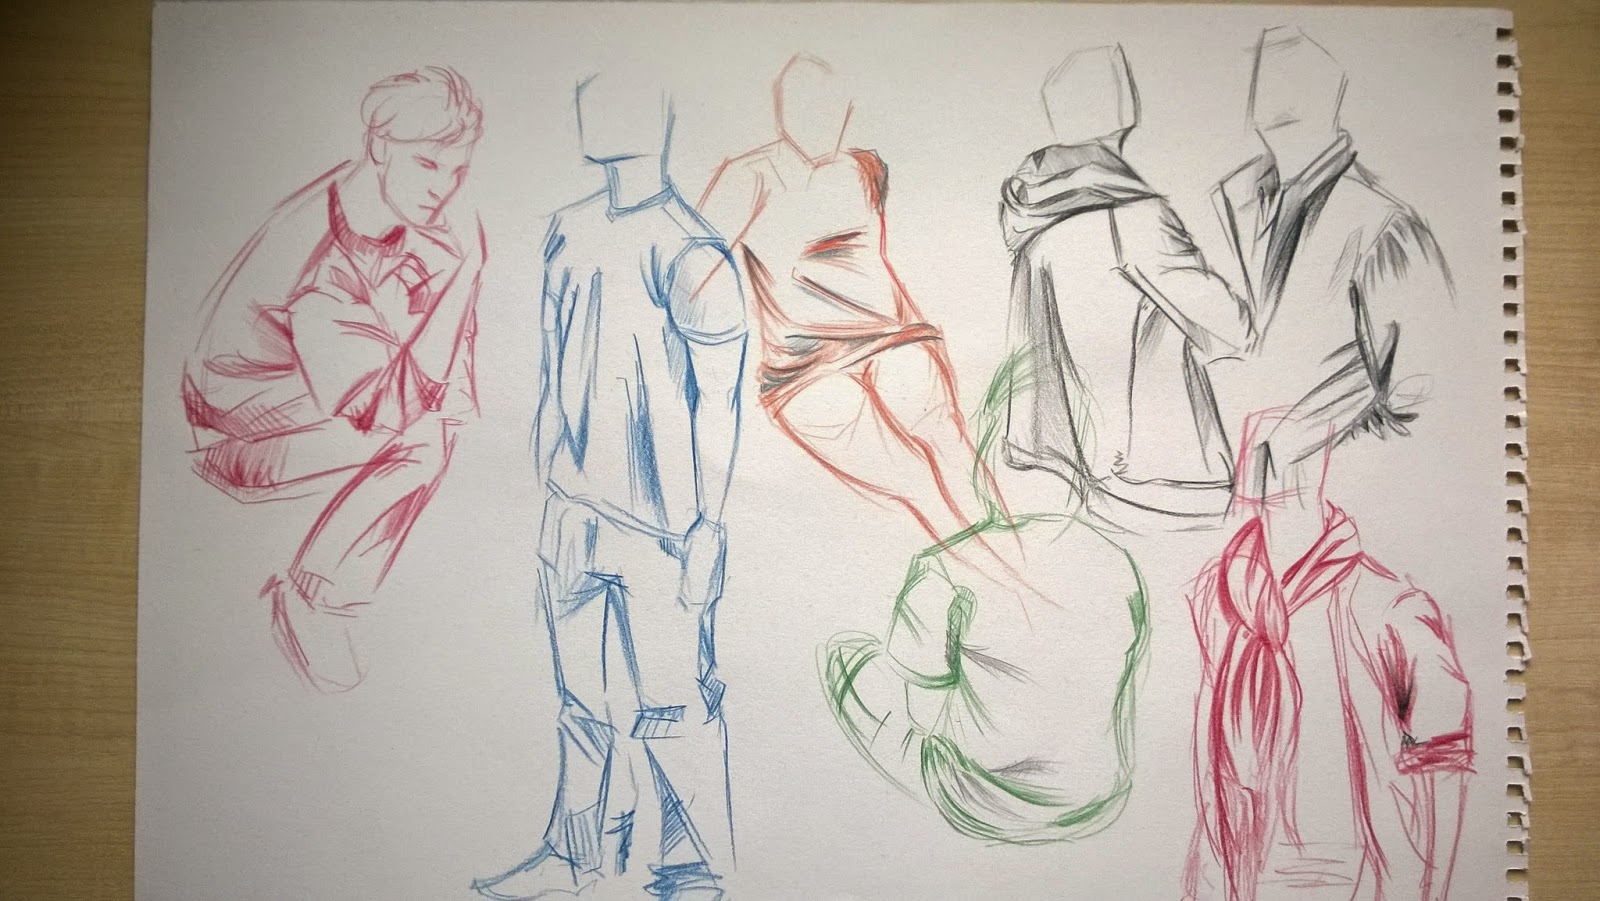
 This week went very quick as the character project started. In life drawing the session took a turn and I had to draw my classmates. Of course it wasn't just drawing plain old standing poses, instead I had to focus on drawing only the clothes. The main focus was to draw the folds and creases, similar to last weeks session when rather than drawing the model I only had to draw the drapery. It was quite fun, because the poses were very quick and the models changed every few minutes. I used different materials and I think the colour variety is more pleasing to the eye.

It was the first official week of the character project and  had our initial idea review that week and the work uploaded here was edited according to the feedback received from the tutors.
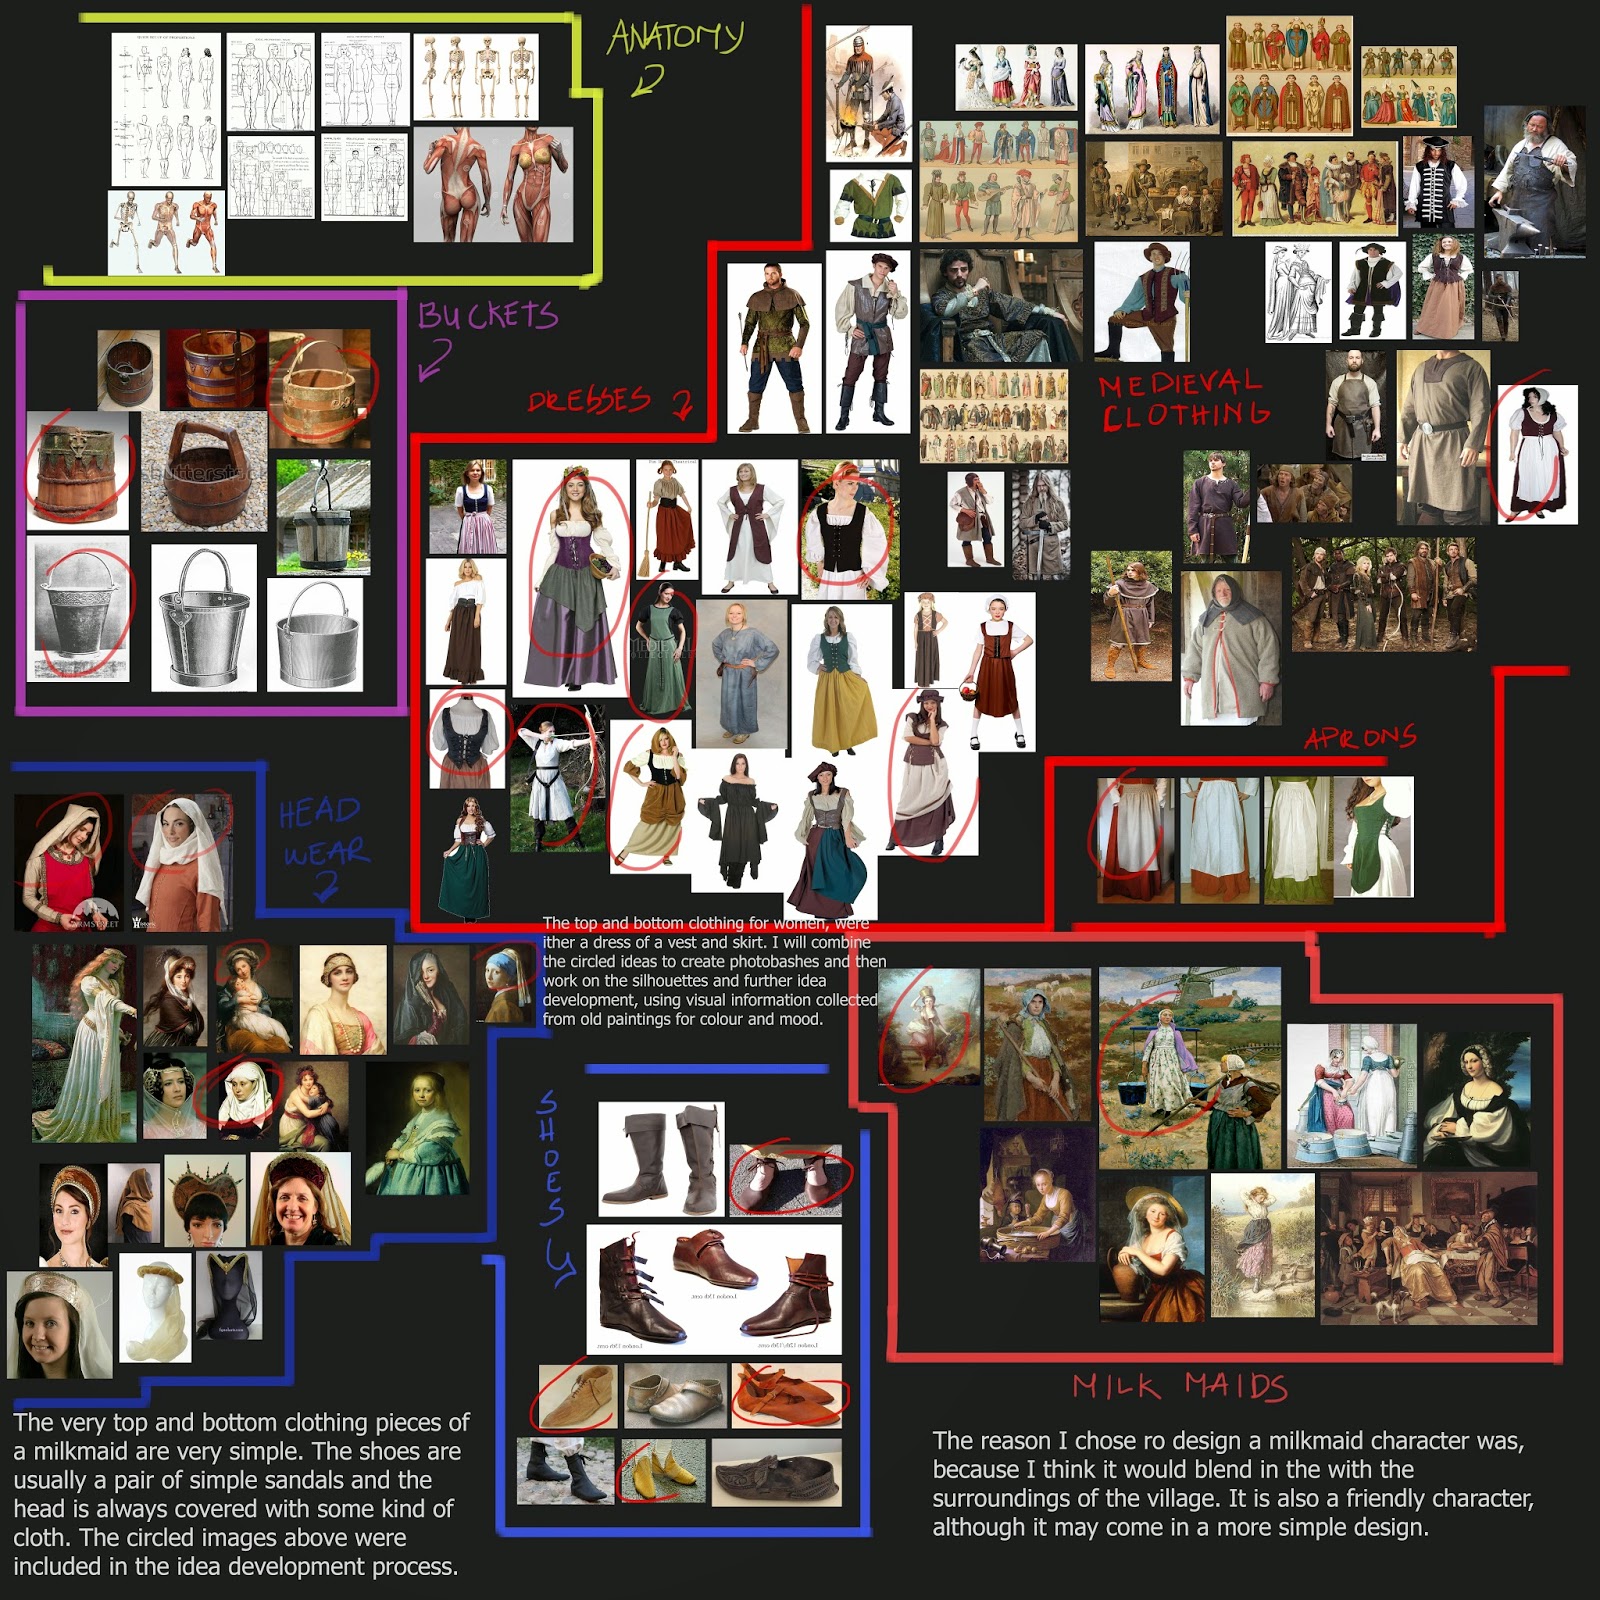
The first step towards the design was to gather  good visual information for the mood board. It was also important to separate each section in the mood board. I later used the same images in the mood board to do some photo bashing to create some quick ideas for my character.
I tried to move towards a character that would look something like milkmaid. I used some traditional ideas and some non-traditional ideas in my bashes. Later on I circled the characters I thought worked most with the theme of the milkmaid.

 After selecting the first ideas, I went onto testing out the silhouettes. It was important that I kept the silhouette with chunky details, so I kept adding more curves or bigger details on the clothes. Lastly I circled the ideas that I thought might work if I added to the final design of the milkmaid. 


Week 17 The end of the BOOTCAMP

Another week of learning basics of character design, continued and so it was the last before starting serious work. 

In visual design we studied clothes and different materials and how they fold. Life drawing made us focus on how drapery falls on the human body. Also it was important to consider shadows and light on the material. The warm up drawing on the right did not go so well as I struggled most of the the with separating the figure from the drapery. Which is why in the longer poses I focused more on the separation of the cloth and figure. I do have to say it was difficult to draw the small creases and also leave out the very light parts on the material.

Further research continued with finding reference images of Medieval clothes and different materials. 
In game production we practised different folds and if materials bent properly on a rigged example model.
Critical studies introduced the Village character brief. It came with a generous triangle budget and quite a big surprise in the end. The surprise was that the character will be based on us, meaning paint overs and art will be done on pictures taken later on in the critical study day.
It's been three slow and easy weeks of learning basics and new things, but it is time to get back to work again. See you next week with some ideas for the character! 

Week 16 Face topology

The week started with studies of facial muscles and anatomy. We researched portrait paintings and various human faces, before we moved onto learning how to draw topology using front and side pictures of our face. The face topology pictures were used in 3DS Max as reference. I was quite relieved that face modelling was not as hard as I expected. And so I was quite happy with the outcome.

The face bellow was modelled using the images of my face topology. The same lines on the model you see bellow, were drawn onto my front and side pictures of my face. After the first time I finished modelling, the face looked a little melted down, as in very flat with no cheekbone definition. So I fixed it by altering the lines of the temples, cheekbones and jaw.


Different Facial Expressions
Critical studies explained key points of how to be employable. Some of those things were identifying if you are a team player and then later on what role you take when participating in team work. More important details of what is needed to be employable were shown in a presentation. Studies continued with investigating yourself on the internet to see what a potential employer  might see  if my name was googled. All in all the week went quick and easy.

Wednesday, 14 January 2015

Week 15 The human anatomy


It has been three weeks since the last project and it was time to go back to work. Term 2 started with learning the basic of anatomy. We looked at idealised human proportions and learned the average body measurements, like the average human body is 7,5 heads high and the legs are four heads high. The tutors were kind enough to provide the best anatomy material from books and also I have picked up a couple of other anatomy books specialised for artists for a refresher of the basics.
In life drawing the lesson brought me back to the basics as well and we did draw everything learned so far from term 1.


I do think I have improved greatly on life drawing. This class also allowed me to develop my understanding of how the human body works. 
Although I have put in a little more effort into the first drawing because I was given more time,
I noticed I have made a mistake by drawing the arm too short on the third body. I still
enjoy quick gestural drawings as they are much more entertaining to do.
Further research and learning continued with taking pictures of myself and other people.
Doing these exercises makes it easier to understand bone structure, plus facial muscles.
In game production I started making a low poly female body. The method used to create the model was planar modelling. The head was already pre-made, so all I had to do was extrude the shapes from the neck plane by plane following reference.
Another trick in this method of modelling, was that I only had to create one side of the body and then use a symmetry modifier to get a symmetrical copy of the half body. It kind of felt like connecting two pieces of an Easter chocolate bunny.

CRITICAL STUDIES!
The week ended with some new years resolution planning for the course. We were provided with plans containing boxes to fill in strenghts and weaknesses and how to improve in every area of the course. There was also a section in which I had to answer what could prevent me from making improvements. These are some goals I have set myself:

  1. Visual Design: Improve on my life drawing and value ranges. I will do that by purchasing a wider variety of pencils and practise more.
    I would also like to work more on researching and taking my time on developing ideas more before moving onto final concepts.
  2. Game Production: I would like to improve on modelling by also practising more with the techniques I've learned so far.
  3. Critical Studies: I have to admit, probably the hardest part of the course as it is unreasonably hard to write blogs every week. I want to start posting my blogs Sunday nights. Another important thing would be to work on my English skills, grammar, vocabulary and punctuation. Also perhaps the most important thing for me would be to become more analytical and descriptive about my work.
I had to think about where I see myself at the end of each year of studies, also I had to visualise where I'll be after graduation. I know for sure I want to have greatly improved as a student and a person by the end of the first year. The second year I'd like to finish the year and having skills that would allow me do my work in the third year with ease. Eventually the end goal is to graduate and get a decent job.Next week Critical Studies will help me decide which career path I'd like to take and I am looking forward to what I might decide that day.

Thursday, 8 January 2015

Week 11 Conclusion of the Tree project and Term 1

The last week of the first term turned out to be a review week and for that reason it was a week full of self directed studies. The self directed time included an opportunity to do some clothed model sketching in the Life Drawing studio. The students were allowed to choose what to draw, so me and a couple of other students asked the model to do some quick sketches of different seated and standing poses. This would have counted as primary research for the upcoming Stylised Character project.

I moved onto modelling the trees in 3DS Max. The project introduced two new techniques for making 3D models. One of them was creating the tree drawing an NGon and a line for the base of the tree. Then I created a loft along the guidelines and continued creating spline lines. Up to that point there was no need to change the model to an editable poly. I only needed to change the object to editable poly for extruding branches along the created splines.
I had applied the bark texture to the loft right after it was created and for that reason there was no need to unwrap it, only the branches needed it.
Example of the tree branch with Alpha
Channels applied
After unwrapping, phase two of the tree creation started with creating a tree branch and leaves. Adding a single new Alpha Channel made the texture transparent in 3DS Max.
To finish the model I had to copy around planes with the branch texture applied to it and the model was done and ready to port to the Unreal Engine.

The trees could have been improved in more than one way.
To improve my tress I could create a different tree with more branches going out of it. I could also change the colours and add more chunkier leaves for the alpha textures. Perhaps adding more branch  and leaf planes to the trees could make it look more rich with leaves.  Also the branches of the tree could have been made longer to look more realistic.
In conclusion I am quite happy with the trees as they do not look alien to the village when in engine.
So far I love the course and I've learned so much in such a little time. I look forward to what the next term will teach me and how I will develop as a person and an artist.

Week 10 The tree project

Week 10 was the start of the Stylised Tree project. It was an easier project compared to the previous house project, but it came with it's own challenges and new techniques to learn. But before I tested out the new ways of making the 3D models I did my primary research by gathering first hand research of images from parks. It came as a benefit that the trees were leafless this time of the year, as it was easier to learn how organic objects tend to grow. The other steps I took were gathering interesting images from the internet and then making of mood boards.


Chosen ideas for the 3D models

I drew silhouettes of trees and then copied the silhouettes around and changed the appearances to create as many different trees as I could. Then my work development continued with making the decisions of which silhouettes seemed most interesting to me, the ones I chose to develop further I started rending out some dark grey values to have an idea what the silhouette would look like in a more 3D form. Painting in values into the silhouettes is probably one of my favourite part in the development. It is most exciting to see a flat shape gain more of a 3 dimensional look. After the silhouettes were done I have gathered some opinions from my classmates and friends to know which tree drawings seemed most interesting to them. I had also to keep in mind that I had to follow the same style guide and avoid making my tree too skinny. So after the big decision making I chose two trees that I thought were most interesting and what suited the given style and painted the trees from angles I will need to use when making my tree in the 3Ds Max.
Those angles were later copied multiple times to do some colour tests for the trees.
I tried to choose harmonious colours for the trees and at the end I chose which colours to use for the textures.
The week was not all about creating concepts of trees, we did some shadow and light drawings in Visual Studies. We used charcoal and white chalk to investigate how lighting reflected on a human body. The challenge was to only sketch out the brightest and the darkest tones of the body and mid tone paper did the rest of the work. I think I could have done better, as I am still trying to improve on balancing how many shades of light and dark I can use when creating drawings.