Sunday 22 February 2015

Week 21 Unwrapping and texturing

Time was already running short, as only two weeks were left for me to conclude the project. I started unwrapping the milkmaid model, it took a long while to finish it. I do have to say that so far unwrapping a character has been the most time consuming phase of the work process. I found that the first difficult part was the face. I attempted to only unwrap one side of the face to have time when texturing


, but as I was unable to do so I just unwrapped the whole full face. It was important to allow the face to take up at least 25% of the texture map, to achieve a detailed face at the end.
My troubles didn't end there, after fiddling with the other parts of the character the unwrap was done. Of course it wasn't as easy as that, as I started texturing the model some of the more detailed bits of the clothing was too low in quality when applied to the model.
So after spending more time on trying to fix things, I have decided to create a bucked and then take the risk and use part of the unique object texture map to achieve higher quality. And I think the textures did start to look a lot better.

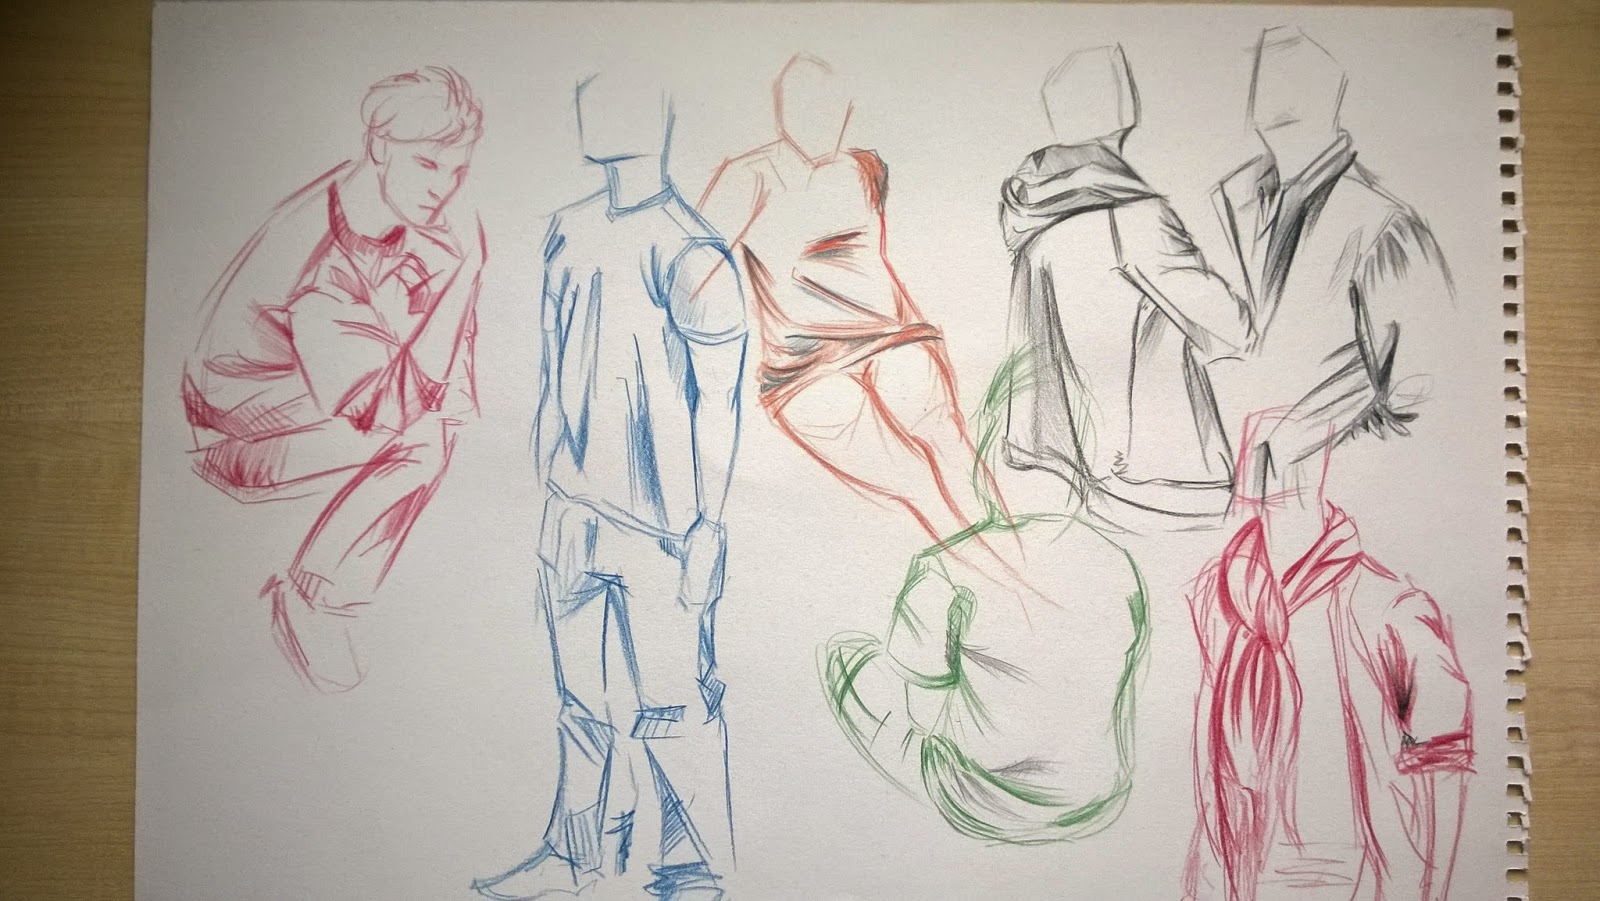
Life drawing once again continued the practise of foreshortening. This time it wasn't with the usual models, but with classmates. We started with warm ups, then moved onto drawing longer poses of ten to twenty minutes. I did find that it was much easier to draw with the practise of last two weeks.
My ongoing challenge is to keep more tonal values in my drawings, so that in these sketches this was my biggest challenge.

The critical studies also continued with last weeks theme. But it was different because we discussed what is to receive feedback. It was informative and I did learn a lot and things I did not consider before relating to feedback.
Feedback is many things that ranges from receiving constructive criticism, learning on how to improve my work, things that work and things that don't, receiving a grade and so many other things related to the word.

Week 20 Modelling

As I concluded the research and decision making on which milkmaid design I would choose to model, the working process continued with setting up reference planes. It was important to keep everything to scale so the body mannequin would line up chin to Chin, waist to waist and etc... This was important to do at the start of the modelling process, to avoid messing up proportions and later having to do major time consuming fixes. 
Creating the body I used strip modelling technique. I found that it was easier for me than box modelling. I also think making the body was the easy part, because when I moved onto extruding the clothes and accessory bits I've
encountered some difficulty with areas like popping out parts of the shirt, or the bottom of the skirt. At the end I've modelled the hands with all the fingers stuck together, except for the thumb, because my milkmaid will hold two buckets in her hands.

The week also had a critical studies session on feedback. I had to mark the work of my classmates, while one of them marked mine. The work was from the character project and of course it was very important to use the feedback to improve my work. I applied most of the feedback onto my character. The feedback wasn't only on the characters, but also on how to improve my blogs. I have not described challenges and difficulties in my recent posts. For this reason I am trying to make an effort to improve on my descriptive and analytical writing.

 
Visual studies continued the practise of foreshortening. This time I had a more difficult angle. I chose to  fit all three poses on one sheet to it would be easier to compare. I do still find it hard to draw a person while sitting at an odd angle, the legs always seem a little out of place. Aside that, I do think I have improved slightly with the help of a morning lecture on drawing limbs using loops on them. It allowed me to visualise where hidden parts might be positioned.

Thursday 12 February 2015

Week 19 Concluding initial ideas

The busy period continued with more idea generation and development.
I took one of the milkmaid photosbashes and added some details from the other ideas. The development of the idea continued with a search for an interesting silhouette, so I created some examples.
Following the style guide, the idea was to stick to chunky shapes, which is why I added more volume to the overall shape where possible. After deciding what silhouette worked well, it was time to generate value examples and colour tests.
Mapping out volumes in a big number was quite difficult, as my character was meant to have a very light blouse. It was important to keep lighter areas on top/middle of the character, so the viewers eye would have a better focus point.
Later it was time to collect some colour references, and those came from images of Renaissance and Rococo period paintings. The colour palettes were applied on my milkmaid ideas. The colours again following the style guide were warm and because the village is meant to have happy soft colours. There were two examples that I have considered using for my final design when texturing.
Aside the character project, in visual design we focused on foreshortening. Foreshortening appears when something like a human is sitting at an odd angle to the viewers position. Foreshortening mostly appears in the limbs, for example a leg may seem shorter or an arm.
I have to admit foreshortening is a very weak area of mine, but I did try to focus and push myself to achieve a more believable human figure with the distortion foreshortening created.


Thursday 5 February 2015

Week 18 The Village Character


 This week went very quick as the character project started. In life drawing the session took a turn and I had to draw my classmates. Of course it wasn't just drawing plain old standing poses, instead I had to focus on drawing only the clothes. The main focus was to draw the folds and creases, similar to last weeks session when rather than drawing the model I only had to draw the drapery. It was quite fun, because the poses were very quick and the models changed every few minutes. I used different materials and I think the colour variety is more pleasing to the eye.

It was the first official week of the character project and  had our initial idea review that week and the work uploaded here was edited according to the feedback received from the tutors.
The first step towards the design was to gather  good visual information for the mood board. It was also important to separate each section in the mood board. I later used the same images in the mood board to do some photo bashing to create some quick ideas for my character.
I tried to move towards a character that would look something like milkmaid. I used some traditional ideas and some non-traditional ideas in my bashes. Later on I circled the characters I thought worked most with the theme of the milkmaid.

 After selecting the first ideas, I went onto testing out the silhouettes. It was important that I kept the silhouette with chunky details, so I kept adding more curves or bigger details on the clothes. Lastly I circled the ideas that I thought might work if I added to the final design of the milkmaid. 


Week 17 The end of the BOOTCAMP

Another week of learning basics of character design, continued and so it was the last before starting serious work. 

In visual design we studied clothes and different materials and how they fold. Life drawing made us focus on how drapery falls on the human body. Also it was important to consider shadows and light on the material. The warm up drawing on the right did not go so well as I struggled most of the the with separating the figure from the drapery. Which is why in the longer poses I focused more on the separation of the cloth and figure. I do have to say it was difficult to draw the small creases and also leave out the very light parts on the material.

Further research continued with finding reference images of Medieval clothes and different materials. 
In game production we practised different folds and if materials bent properly on a rigged example model.
Critical studies introduced the Village character brief. It came with a generous triangle budget and quite a big surprise in the end. The surprise was that the character will be based on us, meaning paint overs and art will be done on pictures taken later on in the critical study day.
It's been three slow and easy weeks of learning basics and new things, but it is time to get back to work again. See you next week with some ideas for the character! 

Week 16 Face topology

The week started with studies of facial muscles and anatomy. We researched portrait paintings and various human faces, before we moved onto learning how to draw topology using front and side pictures of our face. The face topology pictures were used in 3DS Max as reference. I was quite relieved that face modelling was not as hard as I expected. And so I was quite happy with the outcome.

The face bellow was modelled using the images of my face topology. The same lines on the model you see bellow, were drawn onto my front and side pictures of my face. After the first time I finished modelling, the face looked a little melted down, as in very flat with no cheekbone definition. So I fixed it by altering the lines of the temples, cheekbones and jaw.


Different Facial Expressions
Critical studies explained key points of how to be employable. Some of those things were identifying if you are a team player and then later on what role you take when participating in team work. More important details of what is needed to be employable were shown in a presentation. Studies continued with investigating yourself on the internet to see what a potential employer  might see  if my name was googled. All in all the week went quick and easy.